
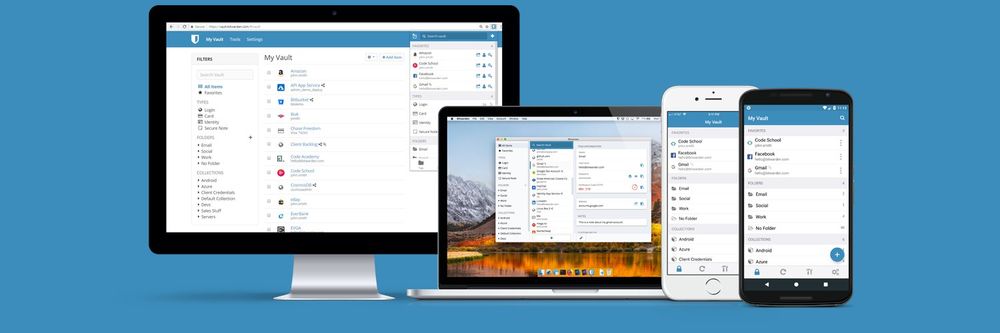
If there are a lot of solutions to store and manage your passwords, Vaultwarden stands out from the crowd, due to its many advantages: it’s an open source software, free, with mobile and desktop clients for all OS.
(Formerly called Bitwarden, Vaultwarden was renamed to avoid confusion, as its author explains: “This project was known as Bitwarden_RS and was renamed to separate itself from the official Bitwarden server in hopes of avoiding confusion. and any trademark issues” )
Its strong point also lies in the possibility of self-hosting ! Thus, you will be able to install it on your own server, and no longer depend on a host, which can have its advantages in the present situation: storing your identifiers / passwords.
In this article, we will see how to install Vaultwarden on our Synology server, using a Docker container.
Prerequisites
The only prerequisite is that your Synology NAS is compatible with… Docker. You can find the list of compatible Synology NAS here .
You can also anticipate the last steps of this tutorial by choosing a subdomain to access Vaultwarden (such as pass.hackabee.fr), by declaring this subdomain in the DNS zone of your registrar, then by pointing it on your server’s IP.
Installing Docker
At first, install Docker through Synology’s Package Center. The installation automatically creates a /docker shared folder in the default package installation volume, you can change the volume from the control panel if you wish!
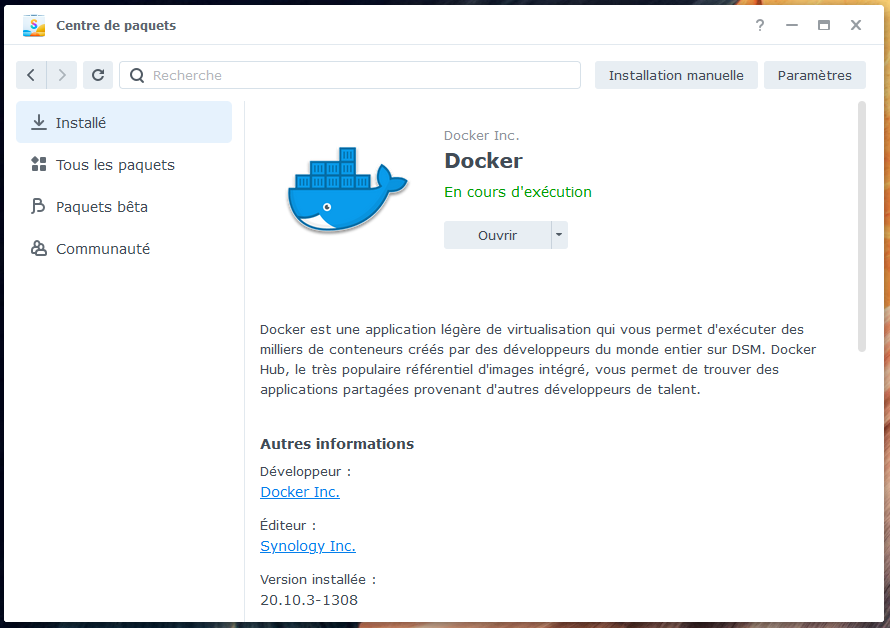
Once Docker is installed, open the application, then go to the “Registry” tab. Search for “vaultwarden“, and double click on vaultwarden/server to choose the version (latest, in our case), and proceed to download the image.

You can follow the download from the “Images” tab . The package weighs around 200 MB.

Vaultwarden Docker Image Setup
Once the container is downloaded, click on “Launch“: we access the Vaultwarden Docker image configuration panel:
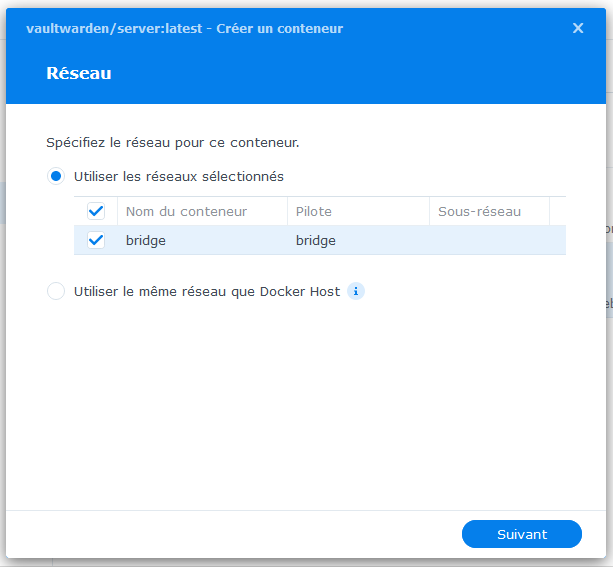
Select bridge for the network, then click Next.
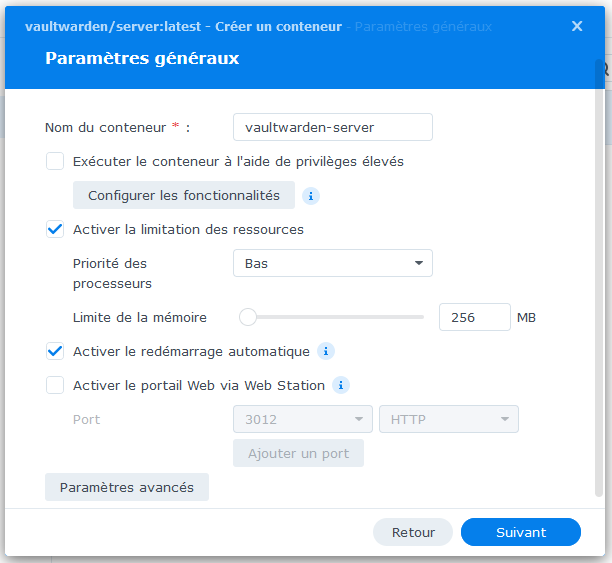
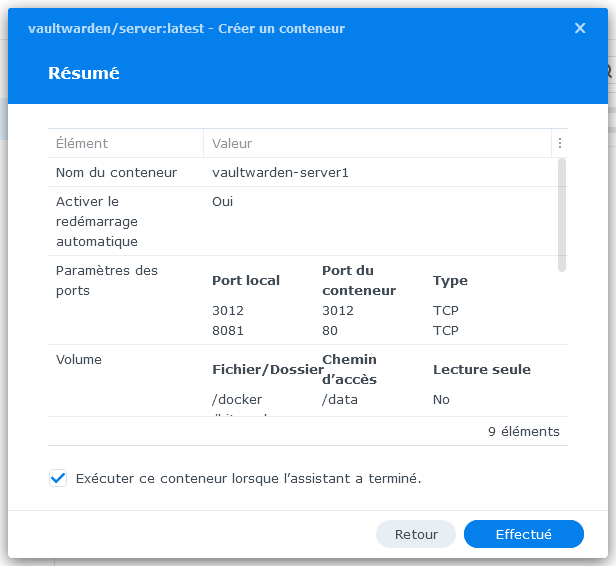
You can now change the name of your container (optional), enable resource throttling (useful if your server doesn’t have a lot of RAM, or if you have many services running on your server), and check auto-restart !
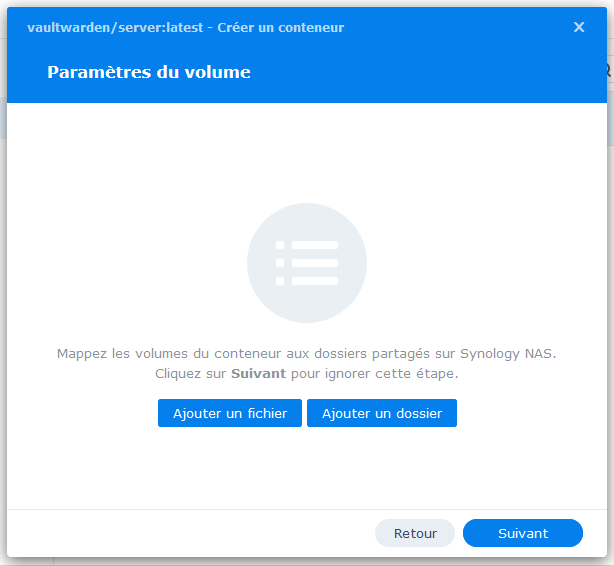
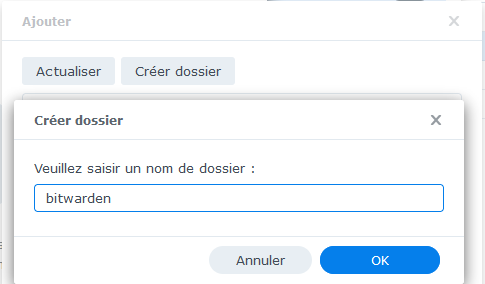
No need to go to the advanced settings, we will now select the folder where the Vaultwarden data will be stored. Click on “Add Folder“, then create a “vaultwarden” folder in the root “docker” folder. Once the folder has been selected, validate then enter “/data” in the “Path” column.

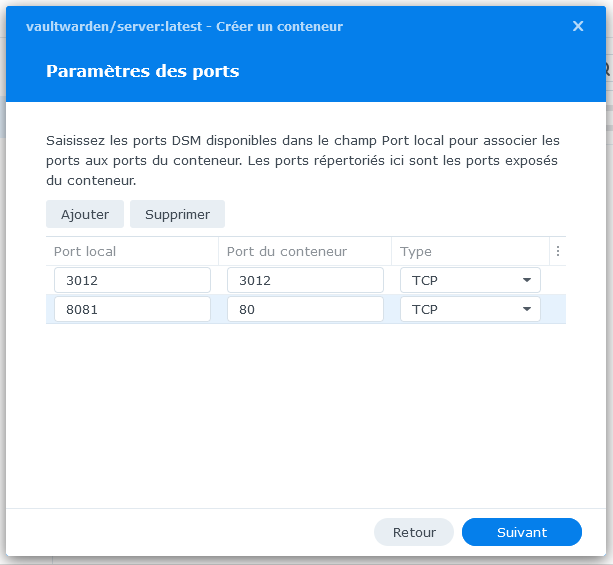
Now let’s move on to configuring Vaultwarden’s ports : you will need to choose an external port other than port 80 to access your instance, so as not to mix everything up with your Synology’s web server. In our case here, I choose to use port 8081 to access my password manager. Enter the port of your choice for the local port, and leave 80 for the container port.
No need to change the external container’s port 3012.
Clicking “Next” takes you to the configuration summary for your Vaultwarden Docker image.
Click “Done”, your instance of Vaultwarden is launched! All that remains is to set up its remote access in HTTPS: for obvious security reasons, Vaultwarden prevents you from configuring your account from an unsecured connection.
Setting up the reverse proxy
We will see here how to create access to your password manager from a subdomain (example: pass.hackabee.fr). As a reminder, you must declare this subdomain in the DNS zone of your registrar, then point this subdomain to your server’s IP.
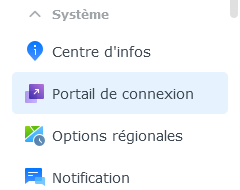
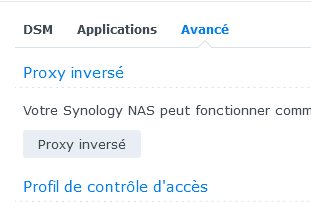
Go to the control panel of your Synology, in the “Connection portal” tab, then Advanced. Click on “Reverse Proxy” to create your reverse proxy entry:
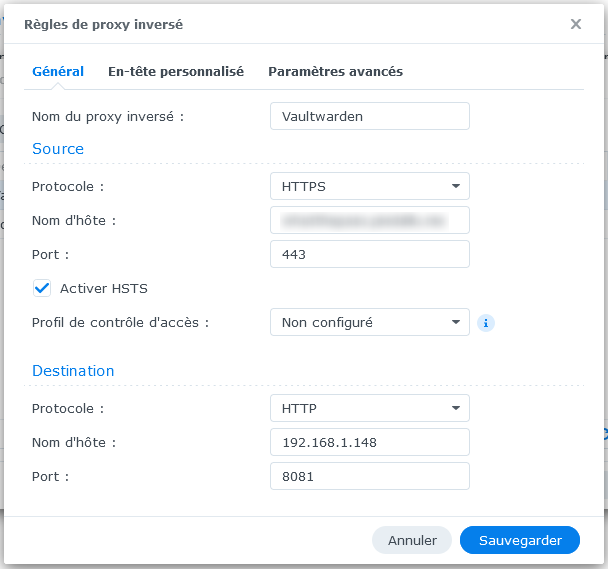
Name your rule, select HTTPS, fill in the subdomain created previously, specify port 443 and activate HSTS.
Finish by entering the local IP of your server in HTTP, and the port chosen in the configuration of your container, then save!
Securing Access to Vaultwarden
All that remains is to create and assign an SSL certificate to our domain! To achieve this, go to the Security tab of the Synology Control Panel:
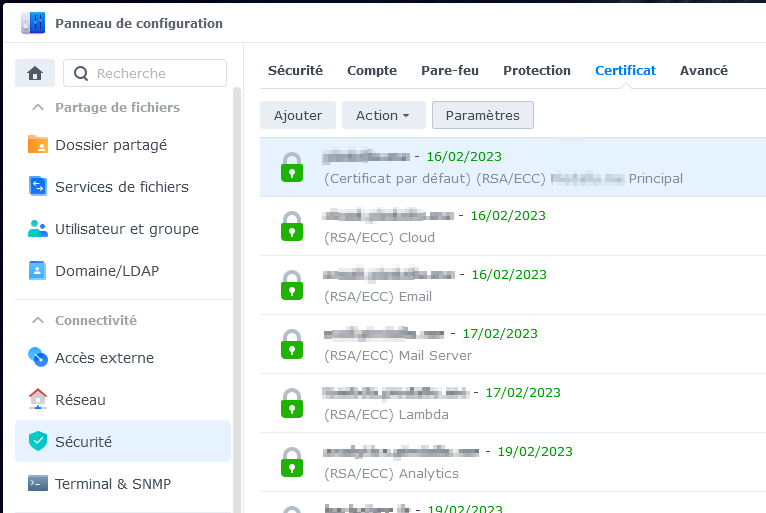
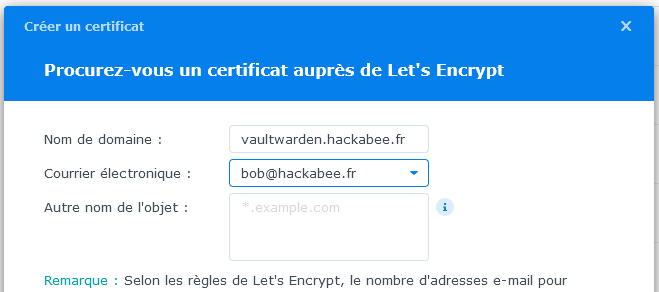
On the Certificates tab, click Add, name your certificate, and check Obtain the certificate from Let’s Encrypt. Then indicate the domain chosen to access Vaultwarden, then fill in your email address (required).


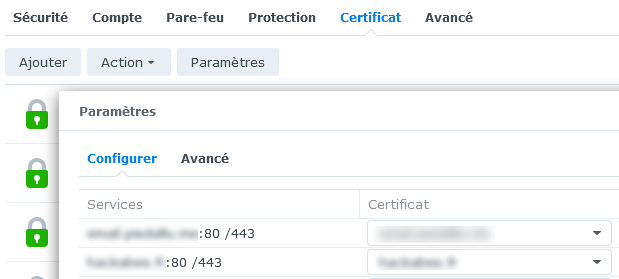
Last step (Phew!): once the certificate has been created, it must be assigned to the subdomain : click on “Configure”, then assign your certificate to the Vaultwarden service (hence the usefulness of properly naming its certificates and its services )
You can now connect in HTTPS to your subdomain, and start configuring Vaultwarden
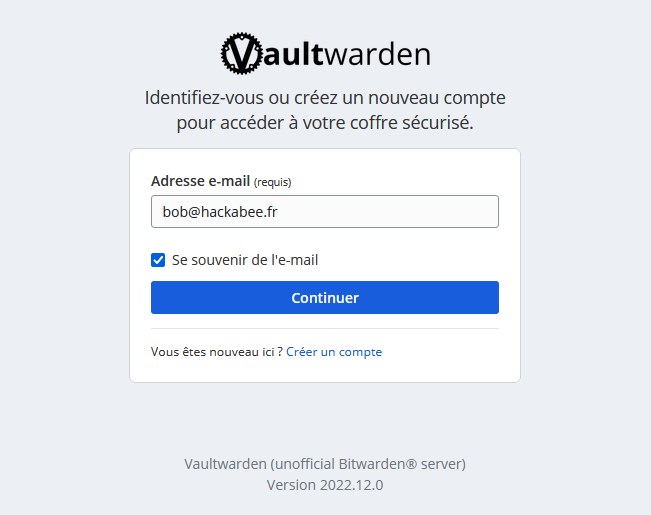
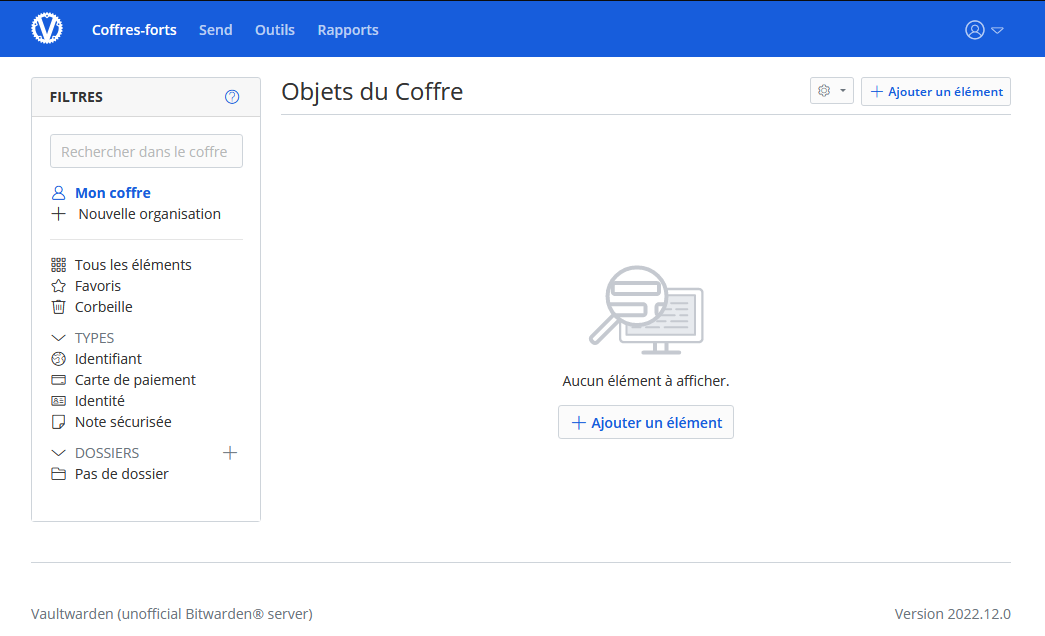
Enter your email address then the information requested to create your safe, and start adding your credentials! We will see the use of Vaultwarden in a future article!
Enable copy/paste on the console of a VMware ESXI virtual machine
Enable copy/paste on the console of a VMware ESXI virtual machine
Install Vaultwarden on Synology (DSM7) using Docker
How to fix PHP 7 bash error to update Nextcloud on Synology?